How to Create T-Shirt Mockups in Bulk
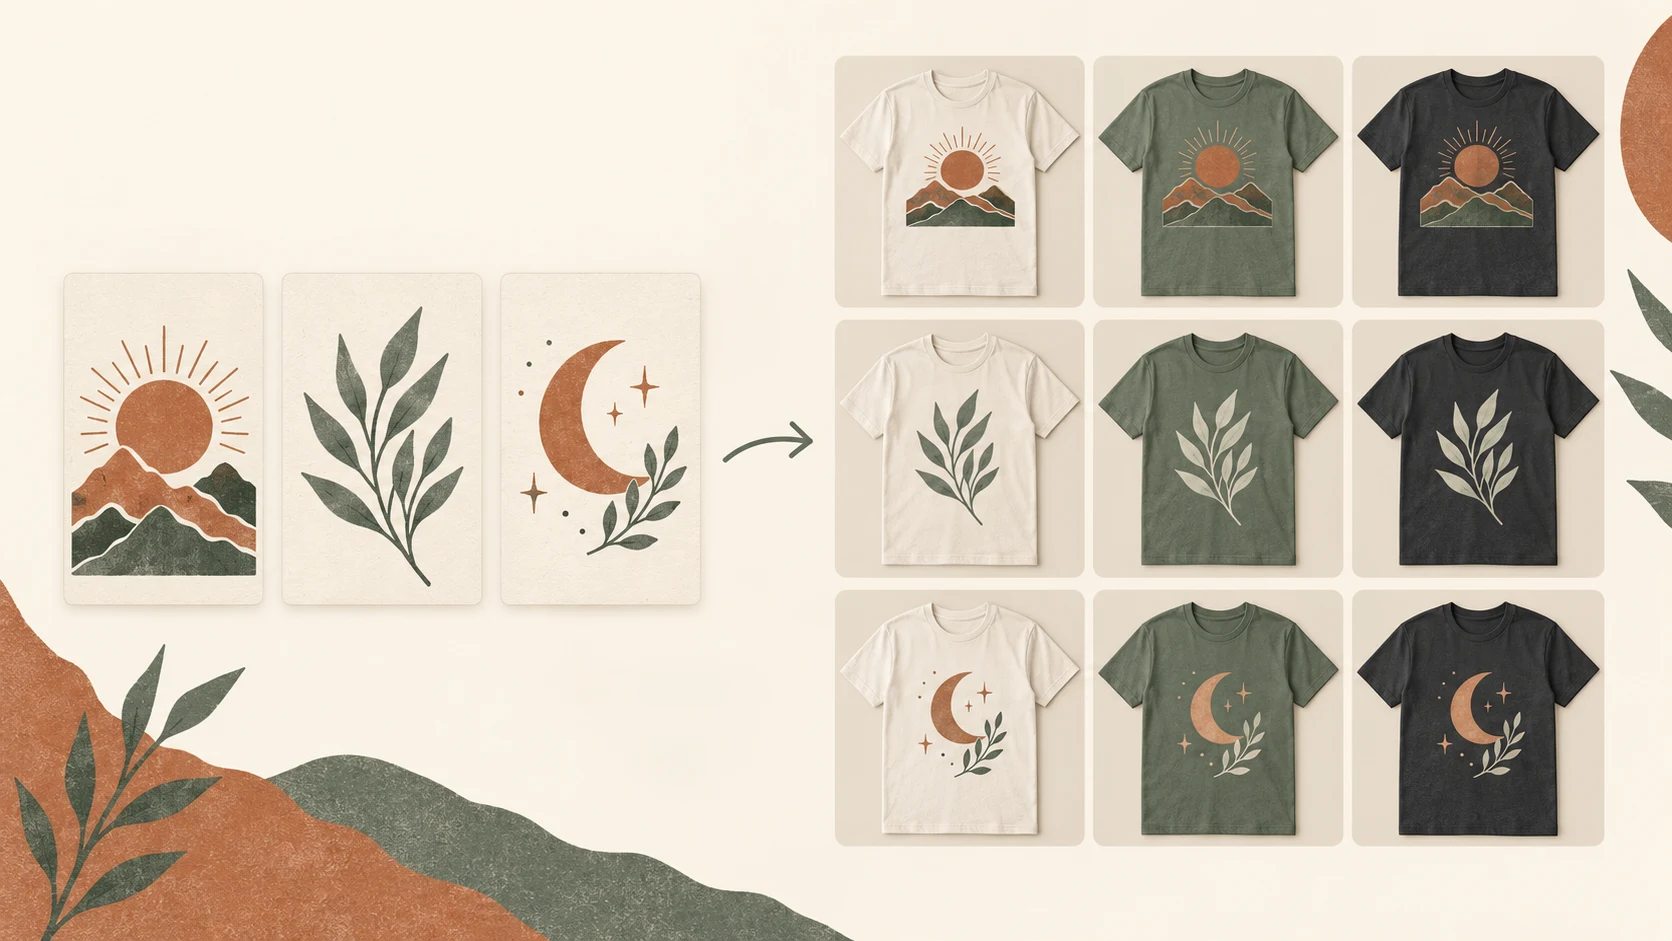
To create T-shirt mockups in bulk, load a folder of designs into a batch mockup generator, choose reusable shirt scenes, set artwork placement, and export the combinations together. Twenty designs × three scenes = 60 mockups. Add two shirt colors per scene and the batch becomes 120 images.
You need transparent artwork files, scenes matching the shirts you sell, and a tool that can process multiple designs in one run.
Choose a bulk mockup method
| Method | Best fit | Setup |
|---|---|---|
| Browser batch generator | You want ready-made scenes or your own blank-shirt photos | Upload designs, select scenes, save placement, export |
| Photoshop automation | You already use layered PSD mockups | Prepare smart-object templates and use a batch plugin or script |
For Photoshop, BulkMockup's workflow combines design files with smart-object PSD templates. Choose that route if your existing templates are central to your shop's look.
The walkthrough below uses PaloTagz's browser-based Mockup Studio. It supports built-in shirt scenes, uploaded photos, saved placement, and JPG batch downloads.
1. Prepare one compatible design batch
Use transparent PNGs so fabric remains visible around the artwork. A white background in the file becomes a white rectangle on the shirt.
- Remove accidental transparent padding; it makes the visible design smaller inside the placement area.
- Group similar proportions. Wide slogans and tall illustrations may need separate placement sizes.
- Separate artwork for light shirts from artwork for dark shirts.
- Use recognizable filenames, such as
book-club-front.png, to keep exports traceable.
Keep your original artwork for printing. The finished mockup is a listing photo with the shirt and scene included.
2. Match the scenes to your actual shirts
Choose the garment you sell before choosing the background. A Gildan 5000 listing should show that shirt's shape and colors. Printify's guidance says custom mockups should closely match the actual product.
Start with three useful views: a clear front view, a model photo showing fit, and a folded or hanging shirt. Select only colors you offer and that suit the whole design batch.
In Mockup Studio, select your designs and the matching Gildan 5000, Comfort Colors 1717, or Bella+Canvas 3001 scenes. You can also upload a blank-shirt JPG, PNG, or WebP and save its artwork area for reuse.
3. Match the mockup placement to the print
Size and position the artwork to reflect what buyers will receive. A large mockup print is misleading if your production file uses a small chest print.
Use Fit inside to preserve the whole design. Cropping can remove letters or illustration edges. Adjust rotation for angled shirts and save a placement for each scene; a folded shirt and a model photo need different positions.
In Mockup Studio, a saved placement applies across that scene's colors. It also applies to every design you render on the scene, which is why grouping similar artwork matters.
4. Check three designs before rendering everything
Use a wide design, a tall design, and one with small text. Generate them on your chosen scenes and inspect the exported images.
| Check | Fix |
|---|---|
| Letters or edges are missing | Use Fit inside and check the original artwork |
| Artwork looks unexpectedly small | Check transparent padding in the source file |
| Ink disappears against the shirt | Change the shirt color or use a contrasting artwork version |
| The print crosses a seam or sits too low | Reposition the artwork area |
Check the first-photo candidate at thumbnail size. If the artwork is hard to recognize, choose a closer scene.
Then render the remaining designs. Mockup Studio applies every selected design to every selected scene and color, so keep incompatible combinations in separate batches.
5. Export and use the right images
Download the JPGs together with Download all (.zip). Filenames include the design title and mockup name. Save the ZIP before starting another generation, which replaces the current results.
Add each design's images to its matching product and keep the clearest view first. For Printify, upload custom images in the product's mockup library, link them to the correct variants, and publish with Mockups enabled. Printify's upload instructions.
PS: Create your first mockup batch in PaloTagz. Select your designs, choose matching scenes and colors, and download the JPGs together.